
How to create a Chocolate Wrapper Nail
How to create a Chocolate Wrapper Nail
To recreate this nail you will need:
- 1 x pre-buffed nail tip (or a natural nail that has been prepped and had base coat applied and cured)
- 000 Ultra Fine Brush
- Fine scissors
- Tweezers
- Nailchemy lamp
- Artisan paint: Gold
- Gel polish: Bright Purple (such as Have Strength) OR Glittery Purple (such as Blackberry Sparkle)
- Purple glitter similar in colour to wrapper if using a plain gel colour
- Glitter brush
- Easter Egg Foil Wrapper
- Non-Wipe Topcoat
- Clear builder gel
- PPE
Ensure your work surface is and you are have gloves on.
Some steps have two methods depending on what polish you have available to use.
Step 1
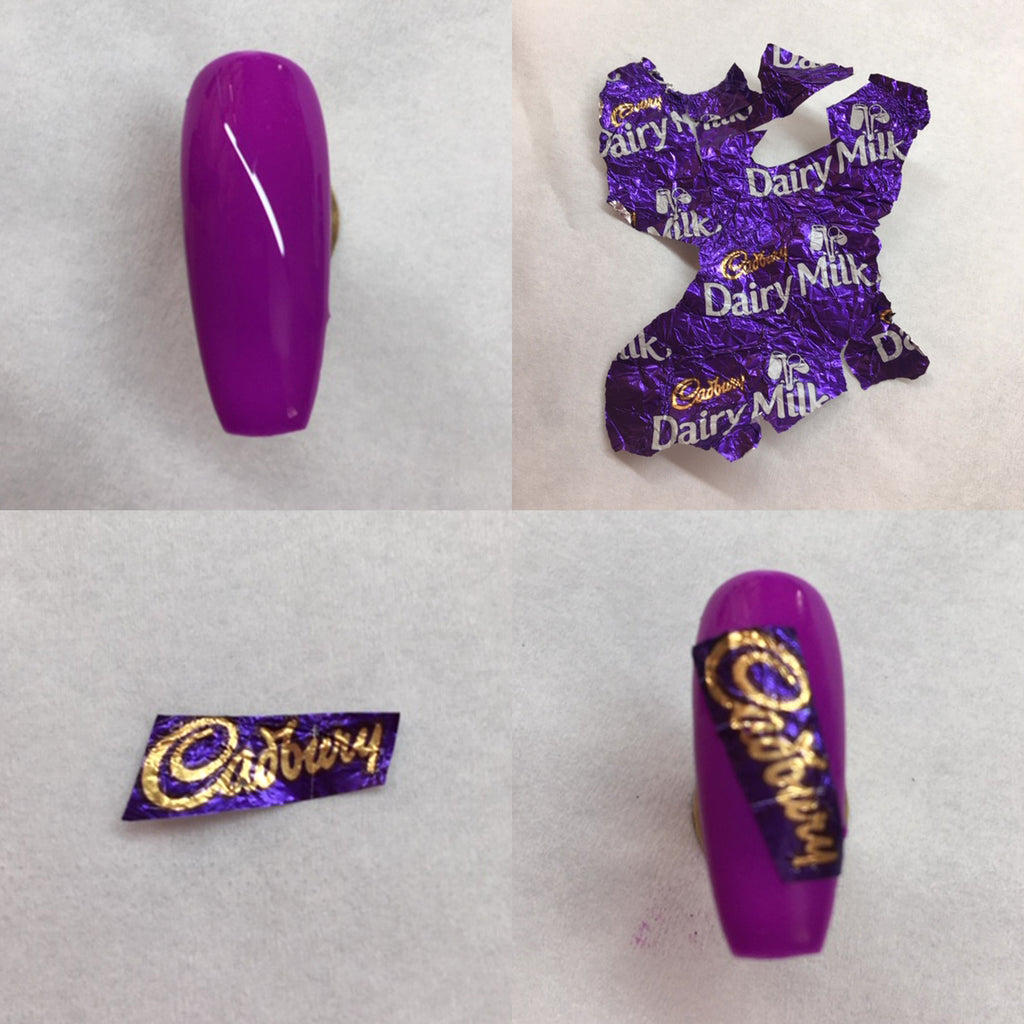
Paint your nail in your purple polish and cure for 30 seconds.
Cut out the word “Cadburys” from your Easter eggs foil.
Place a second coat of purple on the nail and use your tweezers to press the foil in to the wet layer. Make sure it is as flat as possible.


Step 2
Cure for 10 seconds. Then remove from lamp and burnish in glitter.
Return to lamp and cure for 30 seconds.
*if using Glitter gel polish cure for 30 seconds. As no need to add glitter.*

Step 3
Use builder gel to float over the nail.
(It is always advisable when using glitter to have a separate bottle for glitter applications. This prevents the chance of “glitter transfer” on to a flat polish colour).
Turn nail upside down for 10 seconds. (This will help the gel move and cover any height difference from the foil)
Cure for 60 seconds.

Step 4
Using gold artisan paint and 000 brush draw in good lines following the line of the foil to each nail edge. (This helps disguise where the foil and gel polish meet)
Cure for 60 seconds.


Step 5
Apply topcoat.
Your Chocolate Wrapper Nail is now complete!
(Don’t forget to clean your brush by wiping it through base coat!)
We can't wait to see your chocolate wrapper nails! Make sure to tag us on Instagram with #NailchemyChocolateWrapper and show us your creations!
- Sam